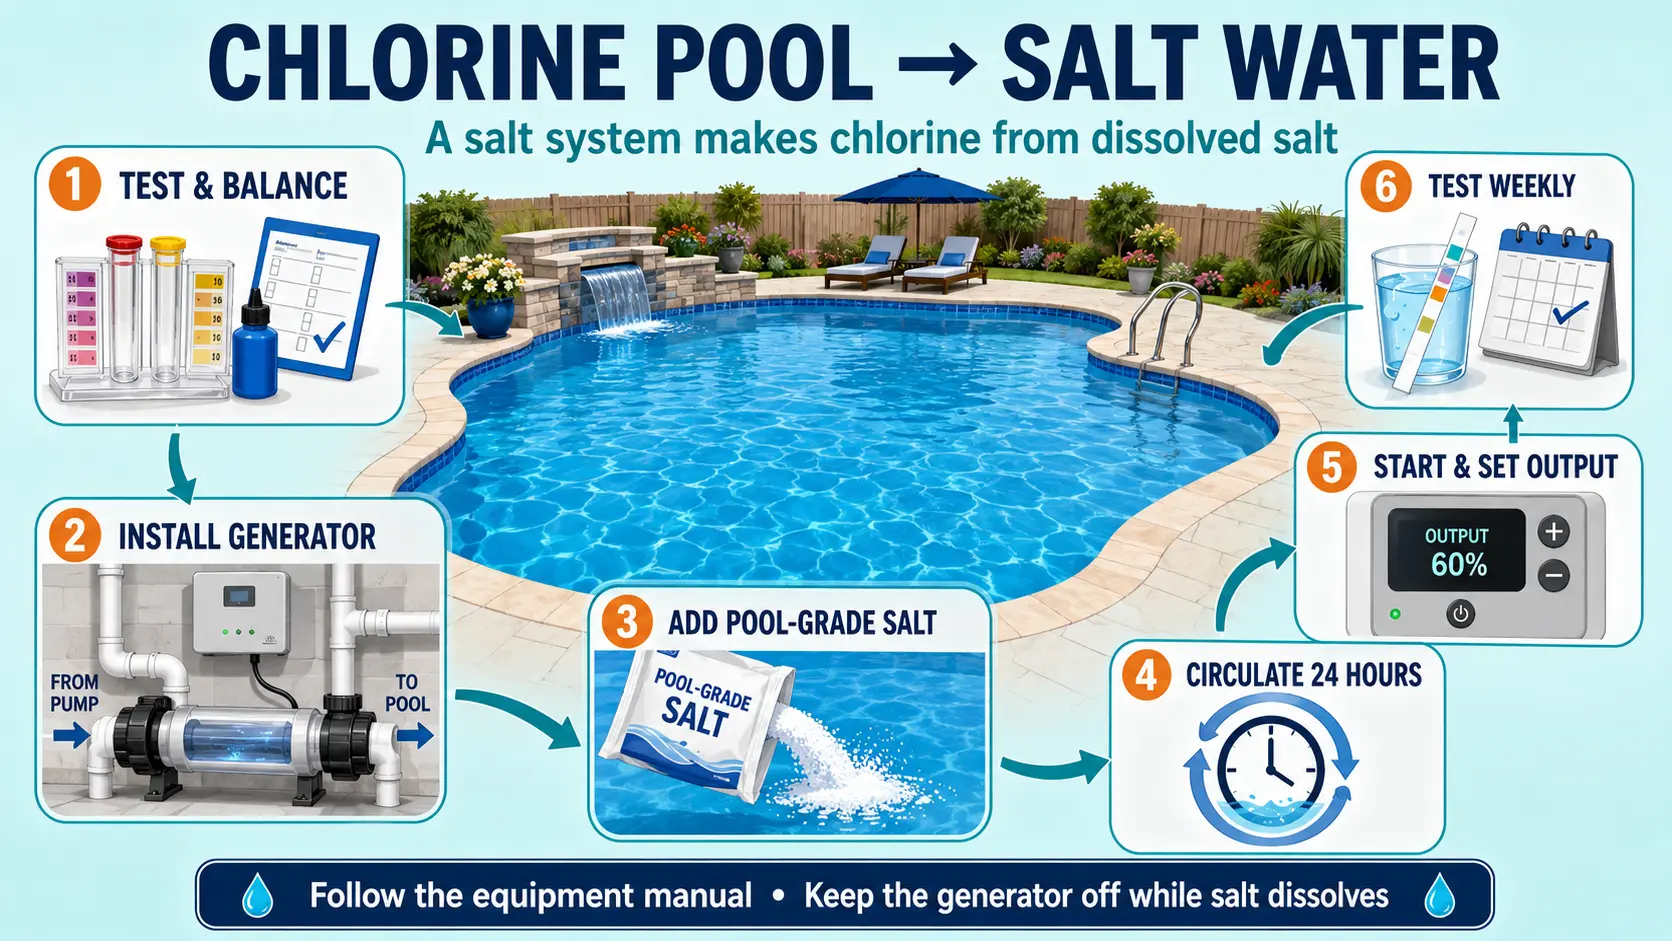
Converting a chlorine pool to salt water is one of the most popular pool upgrades — and in many cases, it's something a handy homeowner can accomplish in a weekend. The process involves installing a salt chlorine generator in the return plumbing, balancing the water, and adding the correct amount of pool-grade salt.
This guide walks through each step, including what to check before you start and mistakes to avoid.
Before You Begin: Check These First
- Pool materials: Salt is corrosive at high concentrations. Check that your pool's heater, ladders, light fixtures, railings, and surrounding materials (natural stone, certain plasters, some vinyl liners) are salt-compatible or can be upgraded.
- Heater compatibility: Older copper heat exchangers can be damaged by salt. Titanium or cupro-nickel exchangers are more suitable for salt environments.
- Electrical access: The salt generator requires a dedicated electrical connection. Have this professionally installed if you are not confident with pool electrical work.
- Plumbing space: The salt cell needs to be installed after the filter and heater. Make sure there is adequate straight pipe run for the cell to fit correctly.
What Equipment Do You Need?
| Item | Purpose | Typical Cost |
|---|---|---|
| Salt chlorine generator (control unit + cell) | Produces chlorine from salt | $400–$1,800 |
| Plumbing unions and fittings | Install cell in return line | $30–$80 |
| Pool-grade salt (NaCl ≥99%) | Raw material for chlorine generation | $10–$25 per 40-lb bag |
| Salt test strips or digital meter | Verify salt level accurately | $15–$60 |
| Muriatic acid | pH management (salt raises pH) | $10–$20/gallon |
| Professional installation (optional) | Electrical and plumbing work | $300–$800 |
Step 1 — Balance the Existing Water
Before touching any equipment, get the water fully balanced. Converting with unbalanced water makes the process harder and can stress new equipment.
| Parameter | Target Before Conversion |
|---|---|
| pH | 7.2–7.6 |
| Total alkalinity | 80–120 ppm |
| Calcium hardness | 200–400 ppm |
| Cyanuric acid | 70–80 ppm |
| Free chlorine | 1–3 ppm |
If stabilizer (cyanuric acid) is at 0, add stabilizer granules before enabling the generator. Without it, UV light will rapidly destroy the chlorine your new system produces.
Step 2 — Choose the Right Generator
Size the generator for at least 1.5× your pool's actual volume. For a 20,000-gallon pool, choose a unit rated for 30,000 gallons or more. Undersizing is one of the most common conversion mistakes — a small cell running at 100% wears out faster and may struggle in warm weather or with heavy bather loads.
Step 3 — Install the Salt Cell
- Turn off the pump and main electrical supply to the pool equipment.
- Cut the return pipe after the filter and heater — the cell should be the last component before water re-enters the pool.
- Install the cell housing using slip-fit unions (allows easy cell removal for cleaning).
- Connect the control unit cable to the cell.
- Mount the control unit in a weatherproof location within reach of the cell.
- Connect the control unit to a dedicated GFCI-protected circuit — a licensed electrician should handle this step if you are not qualified.
Step 4 — Calculate and Add the Initial Salt
Use our salt calculator to find the exact amount of salt for your pool volume and target level. Most generators recommend a starting target of 2,700–3,200 ppm.
To add salt correctly:
- Test the existing salt level first — tap water may already contain some salt
- Calculate the additional salt needed based on the current level
- Pour salt directly into the pool near the return jets, not into the skimmer
- Broadcast it around the pool perimeter, not in one pile
- Brush the pool floor and walls to help the salt dissolve
- Run the pump continuously for at least 24 hours before enabling the generator
- Retest salt level to confirm it has reached the target before starting the cell
Step 5 — Enable the Generator and Calibrate
- Start the generator at 50% output — this gives room to adjust in either direction
- Run for 24 hours, then test free chlorine
- Target 1–3 ppm of free chlorine
- Increase output if chlorine is low; decrease if it's above 3 ppm
- Check pH — it may rise faster than expected in the first few weeks; adjust with muriatic acid
Mistakes to Avoid
- Running the salt cell before salt is fully dissolved — can damage or shorten cell plate life
- Adding salt to the skimmer — concentrated salt can corrode the pump impeller and seal
- Using non-pool-grade salt with additives — anti-caking agents, iodine, or yellow prussiate of soda can stain the pool and damage the cell
- Neglecting pH after conversion — salt systems raise pH; weekly monitoring is essential from day one
- Undersizing the salt cell — leads to premature failure and poor chlorine production under load
- Converting with incompatible pool materials — check with the pool builder or manufacturer before converting if you have a new plaster finish, certain vinyl liner types, or older copper equipment
How Long Does the Conversion Take?
The physical installation typically takes 2–4 hours for a prepared homeowner, or about half a day including the electrician's visit. Allowing 24 hours for salt to dissolve and another day of calibration, most conversions are fully operational within 48–72 hours of starting the process.
Calculate Your Salt Requirements
Ready to convert? Use our free calculator to find out exactly how many bags of salt you need for the initial fill — based on your pool's exact dimensions.
Calculate Salt Needed →